-
Massive Format Interaction Resources
2/8/2025
by: Belin Fieldson
Here's some resources for building interactive immersive experiences which I've found useful.
-
Socket.io Version 3 Update
3/24/2021
by: Belin Fieldson
Socket.io is up to version 4 and there have been some changes
-
New Download and Socket.io Updates
3/17/2021
by: Belin Fieldson
Socket.io is the network package I use for multiplayer gaming data
-
Open Source Fulldome Tilt Brush
1/26/2021
by: Belin Fieldson
Tilt Brush was just made open source by Google, so let's make it work in the dome!
-
How To Build An Equirectangular Sphere Mesh
1/26/2021
by: Belin Fieldson
Build a nice spheremesh with no distortion at the poles using Blender v2.91
-
Mapping Immersive Spaces For Interactive Gaming
8/31/2020
by: Belin Fieldson
Interactive immersive media environments require a variety of per-environment solutions.
-
Bubble Destroyer
1/3/2020
by: Belin Fieldson
This is a new tutorial so you can learn to use the LWRP and Slab Fondler in a fulldome environment
-
Cosmic Orbiters Updates
5/22/2019
by: Belin FIeldson
Updates for Cosmic Orbiters and Journey Through Time
-
Journey Through Time with Fort Collins Fringe Festival
7/14/2018
by: Belin Fieldson
Journey Through Time was created for the Fort Collins Fringe Festival and is playable in Dome Theaters.
-
How to disable Netflix previews
6/30/2018
by: Belin Fieldson
Netflix has some really annoying auto-play preview ads which they provided no option to prevent.
-
Oculus Go - Misses The Mark
5/8/2018
by: Belin Fieldson
Oculus' Go is fabulous hardware, but they made some mistakes which will prevent the headset from having significant adoption
-
Vistastic - Dome Visualizer
4/25/2018
by: Belin Fieldson
Vistastic is a new utility I made to build a dome format media show.
-
Imersa 2018 Schedule
2/9/2018
by: Belin Fieldson
I've been invited to speak about interactive technologies at Imersa
-
Toob Loober For YouTube
1/29/2018
by: Belin Fieldson
I made a new tool for youtube's 360 format video playback.
-
Build A PC Flight Sim For Fulldome In 20 Minutes
1/23/2018
by: Belin Fieldson
No knowledge of coding is required, and all the tools shown in this tutorial are free to use.
-
Tap & Tilt For Slab Fondler
1/22/2018
by: Belin Fieldson
This is a new planetarium tool I created to play with slab fondler.
-
Blogpocalypse
1/22/2018
by: Belin Fieldson
The short version of this story is that I messed up.
-
Download Cosmic Orbiters
1/1/2018
by: Belin Fieldson
Now available on Windows and Mac
-
Tanks Game Mode
1/2/2017
by: Belin Fieldson
There's a Tanks mode now
-
Play Instructions for Cosmic Orbiters
1/1/2017
by: Belin Fieldson
Playing Cosmic Orbiters is Easy
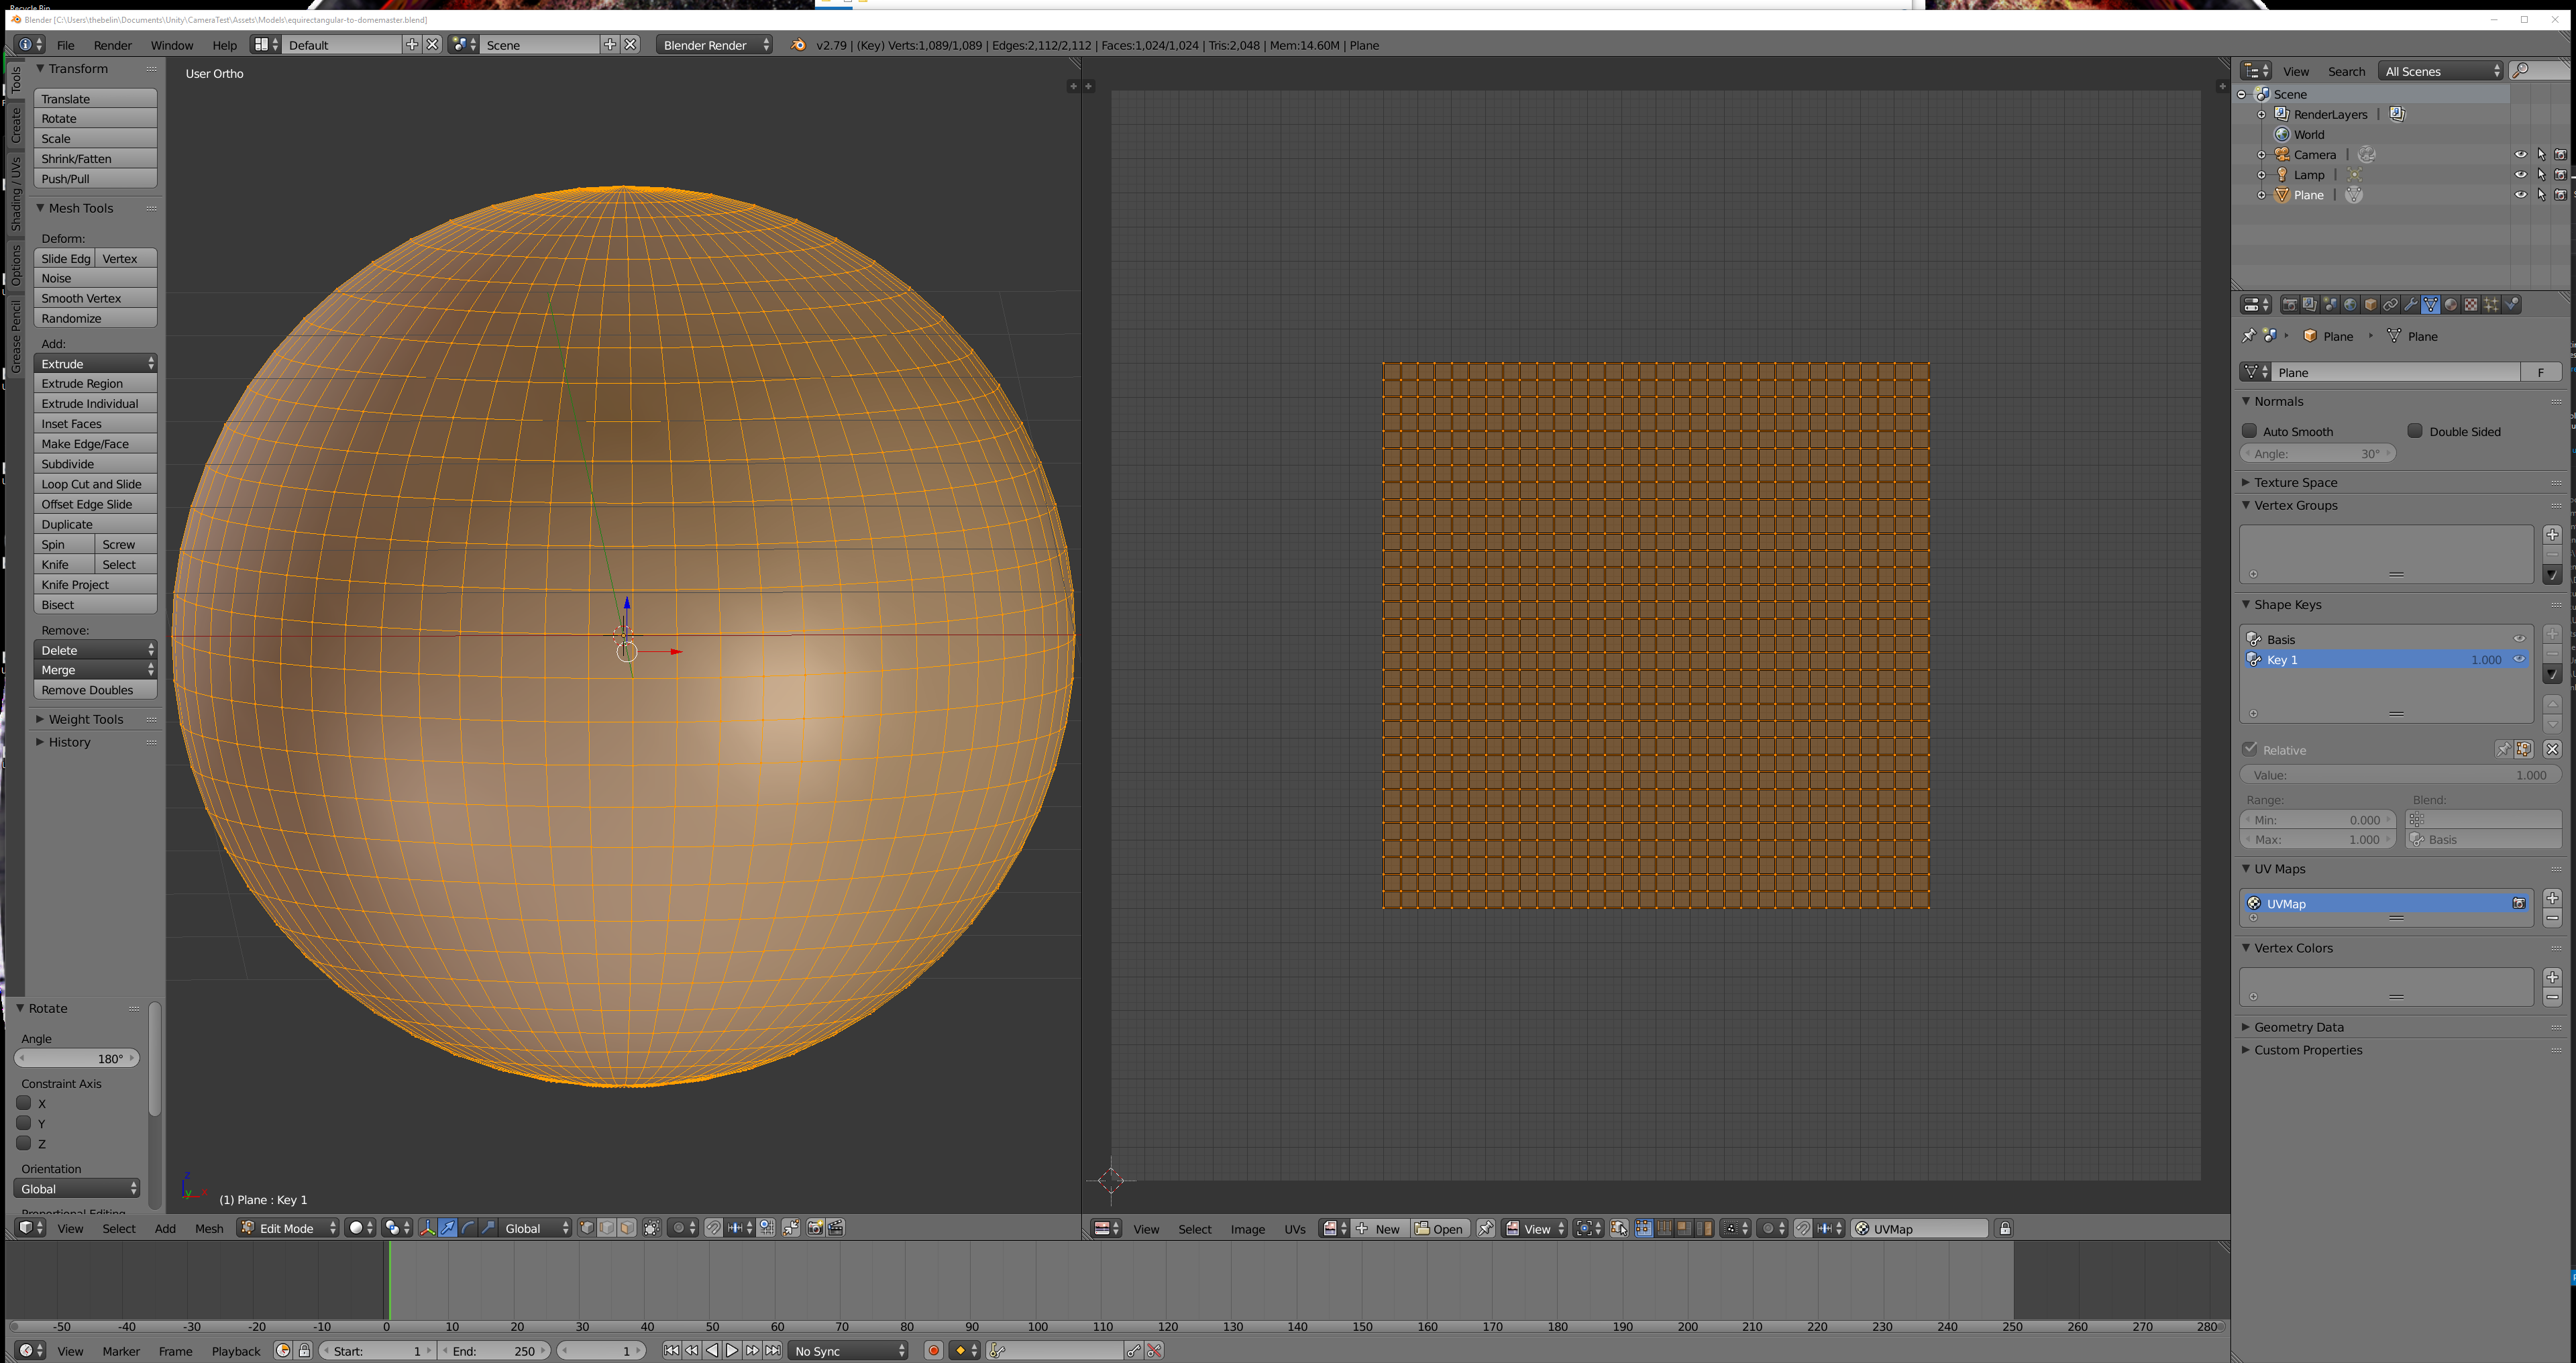 When you are representing equirectangular, also known as mercator, images and videos, you will need a mesh to show it on. This is how you build that mesh using Blender 2.91.