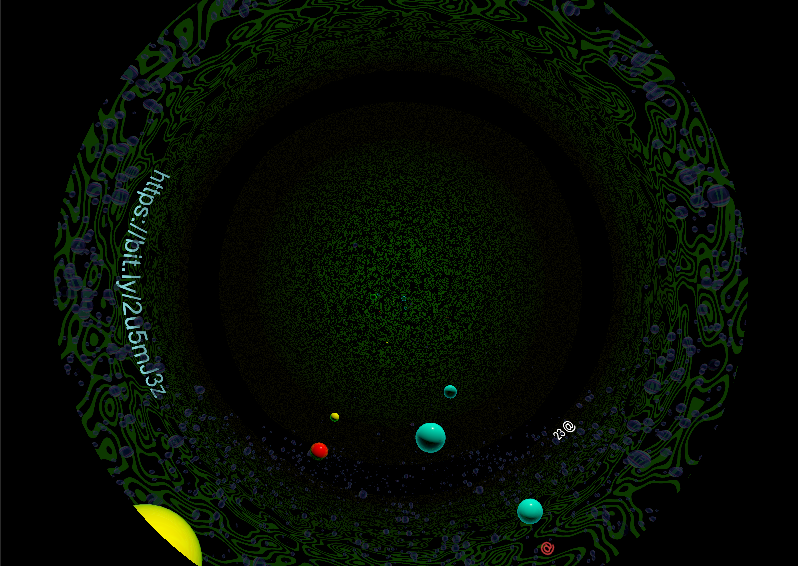
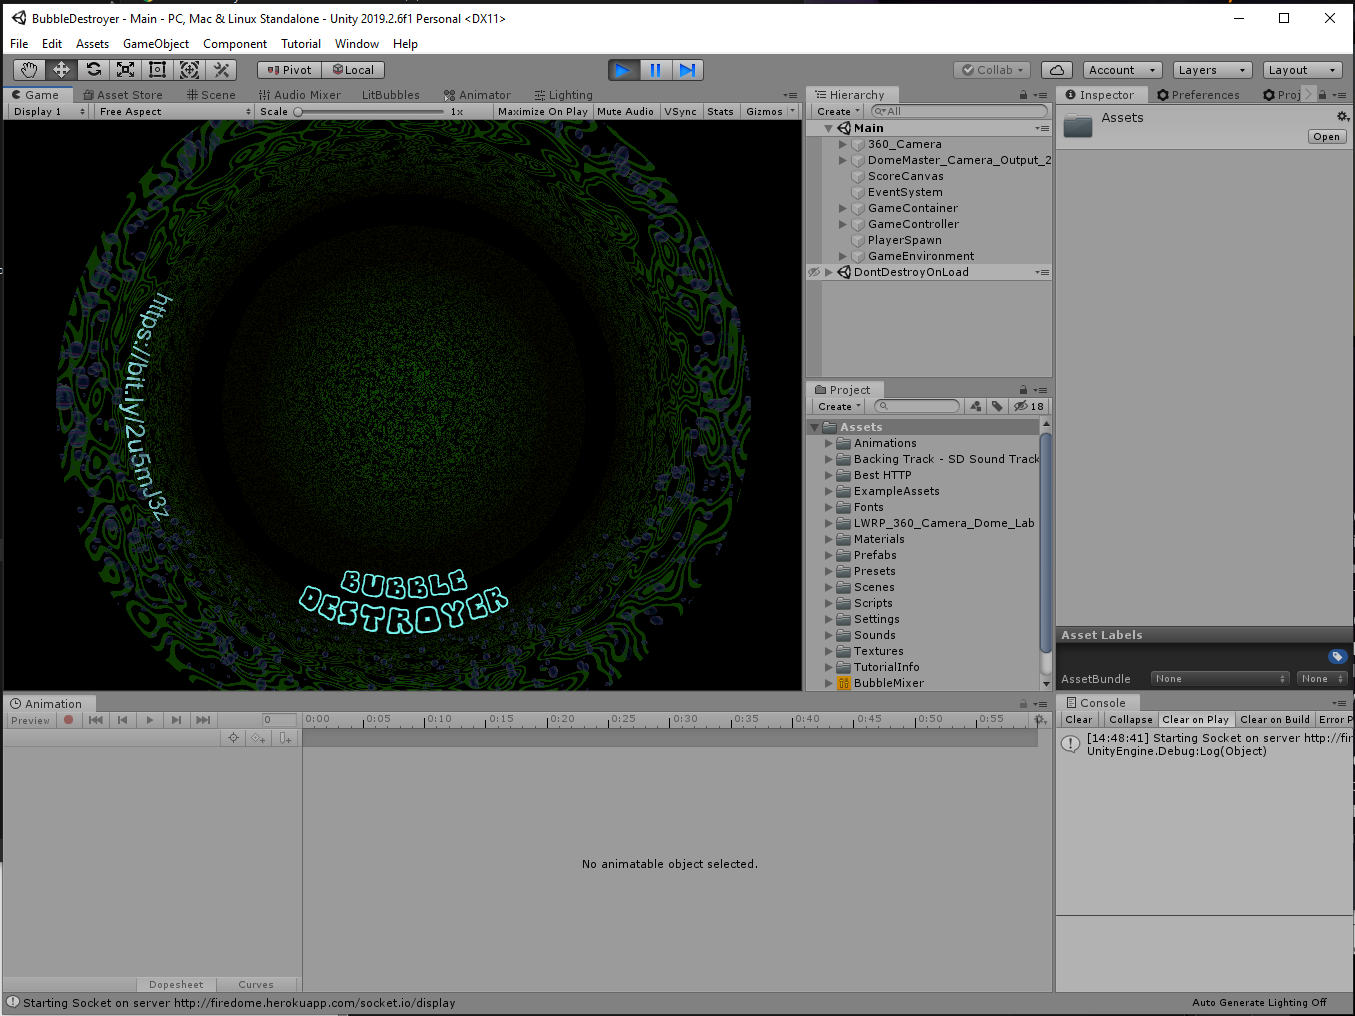
Bubble Destroyer
This is a new tutorial so you can learn to use the LWRP and Slab Fondler in a fulldome environment
-
Downloads
During this tutorial, you’re going to learn to build a game for fulldome display with point mechanics, an intro and exit system, and an environment. We’re going to use the native animation system to make some simple animations that change the environment through the course of the game. No prior knowledge of Unity or game design is required to follow this tutorial, but it would help if you at least do the built in tutorial on how to use the Unity IDE and the names of the parts of it if you’re starting at no prior knowledge.
It uses a LWRP fulldome camera for Unity that I’ve made publicly available on Github to produce a fisheye render for display on an appropriate system. It also lets players use their phones to participate in the game, so up to 24 players can compete. This is done through an open source web server you’ll set up on a secure free cloud provider service. I’ll explain how to set that up on a free Github account and a free Heroku instance.
I love to code and I build things in a variety of coding languages. I know that most of you don’t feel that way though. I included some code I wrote to make this and other game demos work. You’re free to use this code in your own projects. The fulldome industry needs as many Open Source tools available as possible to create interactive immersive experiences. If you develop a novel solution based on this, please consider sharing it the same way.
Most of the components here are free, built into the Unity framework, Asset Store, or provided in the asset package. The exception to this rule is BestHTTP, a Unity plugin which is available on the Asset Store. It’s a great asset for interacting with a variety of servers but is particularly good with websocket, which is used by the multiplayer server. You’ll need to buy that on the asset store to follow this tutorial to completion. Yes, it’s possible to script all the websocket data transfers without that package, but it is way more difficult. Another handy download is Particles - Bubbles from Playmint. It’s free and includes some way better bubble textures than the ones I photoshopped. I also used a free Sound Asset called Fun & Games that I found on the Asset Store.
If you’re watching this tutorial and following along, make sure you have everything downloaded and installed that you’re going to need ahead of time, and remember to subscribe, and click the bell to get future updates. I put the full text instructions up on my website CosmicOrbiters.com.
Preparation:
- Add BestHTTP/2 (Unity Asset Store) to project
- Download Bubble Destroyer game assets as unitypackage
- Download Camera
- Install Latest Unity (2019.2.6 in this tutorial)
- Name the new project, I suggest Bubble Destroyer
- Select New LWRP Project in startup (or add LWRP package later)
- Add LWRP Fulldome Camera to project (github)
- Add the BubbleDestroyer.unitypackage to the project
- Add SD Sound Tracks Music - Fun & Games (Unity Asset Store)
Package Manager:
Add LWRP if you didn’t get it before
Optional:
- Add Keijiro’s Klak packages to stream output locally or over the network with Siphon, Spout, and NDI
- Add Visual Effects Graph (remember to enable pre release packages)
Setup:
- Edit > Project Settings > Graphics > Scriptable Render Pipeline Settings > EACLightweightRenderPipelineAsset provided in the camera
- CMD+Shift+B for Build settings, Set Architecture to Win64
- Project Settings > Player > Other Settings > Color Space > Linear
- Project Settings > Physics > Gravity X:0 Y:1 Z:0
- Set Background Type to Solid Color
- Set Background to black
- Remove Default Camera
- Add Fulldome 220 degree camera prefab
- Create display layer at layer 30- cameras and meshes are already configured to use
Floor And Roof
The floor and roof have a stylized Caustics effect that we’ll build in Shader Graph, just to get a little bit of familiarity with this tool. Since we’re using LWRP, Shader Graph is already part of the project.
In the Hierarchy:
- Create a new plane, name it Floor
- Resize it to scale 100 in each direction
- Position at Y -30
In the Project
- Add a new directory, name it Materials
- In Materials, Create a new Unlit Shader Create New / Shader / Unlit Graph named Caustics
- Create the Caustics Shader Graph as outlined in Shader Instructions <
> - Create two new Materials in Assets/Materials: SeaFloor, SeaRoof
- Assign the new shader to each material,
- Assign the materials to the Floor and Roof Panes
- Set color/tiling/density/offset on materials according to taste
Fog
There’s no fog in the LWRP but we can use a trick to make a linear fog imitation in the scene. This multi-layered curtain can also contain user defined textures for radial visual effects. We’ll make dark expanses to give the game environment a deep underwater feel.
In the Project
- Create a new Material in /Assets/Materials named Fog, use the LWRP unlit shader
- Set the unlit shader to transparent mode with alpha channel transparency
- Set the Render Face to Back
- Set the color to R0 G0 B0 A90
- In Advanced Priority should be 5
In the Hierarchy
- Create a new GameObject - Name it FogContainer - reset transform
- Create a new Cylinder in GameObject and name it FogLayer
- Remove the collider
- Set the Scale on FogLayer to X100 Y500 Z100
- Set the material on the FogLayer Cylinder to the Fog Material you created earlier
- Duplicate the FogLayer Cylinder 5 times
- Set Scale on the FogLayer (2) to X200 Y500 Z200
- Set Scale on the FogLayer (3) to X300 Y500 Z300
- Set Scale on the FogLayer (4) to X400 Y500 Z400
- Set Scale on the FogLayer (5) to X500 Y500 Z500
- Set Scale on the FogLayer (6) to X600 Y500 Z600
- Save Your Game
Environment Bubbles
In Project
- Create ParticleBubble material in Assets/Materials
- Set shader to LWRP/Particles/Unlit
- Surface Transparent
- Set Base Map to Bubble Texture
In Hierarchy
Outer Bubbles

Audio Setup
We’re gonna do the audio setup before making any prefabs that contain Audio Source objects. That way, we don’t have to go back at the end and change the ones we make. This is a super simple audio setup for a game.
- Create New Main Mixer named BubbleMixer
- Add Two Groups, SFX and BGM
- Set BGM to -14 Attenuation
- Add Duck Volume to BGM
- Add Sender to SFX
- Set Receive to the BGM/DuckVolume at -40dB
- Add SFX Reverb to Master Set Dry Level to -300
- Add Normalize to Master, leave basic settings
Optional: Set up Surround Sound output in Project Settings > Audio > Default Speaker Mode
Player Prefab Setup
In this game, each player is a pointer, and the player object will reorient in the game scene as the user reorients their phone. In any multiplayer game, it’s a good idea to build a player prefab. This makes sure that everyone is defined according to the same rules. There’s a couple parts that we don’t use much in this game but are useful for building more advanced interactions for users than popping bubbles, like multi-touch and a physical interaction hinge for picking things up and moving them around in the game interface.
In Project
- Create a new Material in Assets/Materials/ called PingRings
- Set the Shader to LWRP/Unlit
- Surface Type Transparent
- Click on the texture input and set to /Textures/PingRings.png
In Hierarchy
- Add a GameObject, reset the transform and rename to Player
- Add Player Controller and Color Things scripts to Player
- text to @
- middle center anchor
- center alignment
- font size 20
In Animation
- Create a new Animation Clip in Assets/Animations/ called PingMarker
- Press record button in the animator
- Change a value on Scale to 1 and back to 0 again, this is recorded as PingMarker Scale set to 0
- Change the frame setting to 10
- Set PingMarker Transform Scale to X:1 Y:1 Z:1
- Change the frame setting to 20
- Set PingMarker Transform Scale to X:2 Y:2 Z:2
- Change the frame setting to 30
- Set PingMarker Transform Scale to X:1 Y:1 Z:1
- Change the frame setting to 50
- Set PingMarker Transform Scale to X:2 Y:2 Z:2
- Change the frame setting to 60
- Set PingMarker Transform Scale to X:0 Y:0 Z:0
- Click record again to end recording
In Project
- Create a folder called Prefabs
- Drag the Player into the Prefabs folder, creating the Player prefab
- Select Assets/Animations/PingMarker and Uncheck Loop Time
- Delete the Player object in Hierarchy
- Save Your Game
Score Canvas Setup
This will contain the current scores for the game. When each player spawns, their score canvas will be added. When they despawn, it will be removed.
In Hierarchy
- Create a New UI/Canvas, name it ScoreCanvas
- Set Render Mode to World Space
- Set Pos X to 50
- Set Pos Y to -6
- Set Width to 1000 Height to 100
- Set Rotation Y to 90
- Set Scale to X 0.1 Y0.1 Z0.1
- Add a Horizontal Layout Group Component, Set Child Alignment to Middle Left
PlayerPanel Prefab Setup
This is the individual player score display. It will be a prefab that is instantiated for every player that joins.
In Project View
- Create a new material in Assets/Materials, name it UIText
- Set the Shader in UIText to UI/Unlit/Transparent
- Change the Render Queue to 3050
In Hierarchy
- Create a New Game Object in the Score Canvas, Name it PlayerPanel
- Set Width 100 Height 50
- Add Player Canvas Controller script to PlayerPanel
- Set Haptic Multiplier to 100
- Add Color Things script to Player Panel
Bubble Targets Prefab Setup:
This game uses four different colors of bubble, each worth different point scores. We’re gonna build one of them, then make duplicates of it, and tweak the settings on the duplicates to make each target unique. We’re also going to use a new feature called shader graph to build the bubble texture, to learn a bit more about building reflective objects like the bubbles.
In Project
- Create a new Shader > PBR Graph in Assets/Materials/ Name it LitBubbles
- Edit LitBubbles in ShaderGraph <
> - Create a new Material in Project/Materials based on LitBubbles shader named BlueBubble
- Set the Color on BlueBubble Material to light aqua
- Create a new Material in Project/Materials based on LitBubbles shader named GreenBubble
- Set the Color on GreenBubble Material to light green
- Create a new Material in Project/Materials based on LitBubbles shader named RedBubble
- Set the Color on RedBubble Material to light red
- Create a new Material in Project/Materials based on LitBubbles shader named YellowBubble
- Set the Color on YellowBubble Material to yellow
In Hierarchy
- Create a new Game Object name it TargetBubbleBlue
- Reset the transform of TargetBubbleBlue
- Change the Scale to X1.2 Y1.2 Z1.2
- Add Selection Controller Component
- Add a Rigidbody Component
- Set Mass to .01
- Set Drag to .5
- Check Use Gravity
- Add Activation Timer Component
- Set Duration to 30
- Add a sphere collider
- Add Player Points
- Set Reward Points to 1
- Set Cooldown to 1
- Add Zig Zag Physics Component
- Set Max Deviation to .1
- Set Force Direction to X1 Y0 Z1
- Add Animator Controller Component
- Add an AnimatorOnEnable Script Component
- Create a 3DObject > Sphere in TargetBubbleBlue
- Remove the Collider
- Drag the BlueBubble material onto the Mesh Renderer of Sphere
- Add a 3DObject > Wind Zone
- Set the Wind Zone Mode to spherical with a radius of 3
- Create a new Effects/ParticleSystem in TargetBubbleBlue, rename it TrailingBubbles
- Check Looping
- Duration: 4
- Lifetime: 5
- Start Speed: .375 - .75
- Start Size: .01 - .1
- Gravity Modifier 0.1
- Simulation Space World
- Check Play On Awake
- Set Emission Rate to 10
- Check Shape
- Shape is Sphere
- Radius is .5
- Radius Thickness is .01
- Check Color Over Lifetime
- Make a fade-out gradient on last 5%
- Check Size over lifetime
- Set Random Two Constants to .5 - 1.5
- Check Noise
- Set Noise Position Amount to .75
- Set Noise Size Amount to .2
- Set the Renderer Material to BubbleParticle
In the Animation window
Introduction Sequence:
Save Your Game
We’ve got all the prefabs built, it’s time to set the scene for the players and explain to them what they need to do to play. We’re going to build a canvas with text that has a fade-in-out animation.
DetailCanvas:
In The Hierarchy
- Create a new UI > Canvas Object, Rename it DetailCanvas
- Change the Canvas to World Space
- Reset the Rect Transform
- Set Pos Z to 30
- Set Width to 1000, Height to 200
- Set Scale to X:0.1 Y:0.1 Z:0.1
- Add a UI > Text Object to DetailCanvas
- Hold CTRL ALT and shift and click on the position set to lower right corner stretch
- Change the text to read “A fulldome game by InsertYourName”
- Set the Font to Arise / Bold
- Set the Font Size to 50
- Set Horizontal and Vertical to center
- Set the Material to UIText
- Set the Color to light aqua
- Drop the Alpha of the Color to 0
In the Animation Window
- Add an animation to the Text Object, name the animation /assets/animations/TextFadeInOut5s
- Press the Record Button
- Set the Frame Counter to 0
- Set the alpha of the text to 1 and then back to 0
- Set the Frame Counter to 30
- Set the alpha of the text to 255
- Set the Frame Counter to 270
- Set the alpha of the text to 0 and then back to 255
- Set the Frame Counter to 300
- Set the alpha of the text to 0
- Press record to finish recording
GameIntro:
Now that there’s animated text which will display for 5 seconds in each Detail Canvas, we need to make another animation which will cycle those Detail Canvas objects. That’s going to be another GameObject named GameIntro.
- Create a New Empty Game Object, reset the transform, name it GameIntro
- Add new Audio Source object to GameIntro, name it IntroMusic
- Change the IntroMusic source to Assets/Fun & Games 1min 3s
- Check Play On Awake
- Deactivate DetailCanvas
- Make DetailCanvas a child of GameIntro
- Duplicate DetailCanvas 11 times
- Change the text in all the canvases to introduce the game and acknowledge contributions. Here’s my suggestions:
- “BUBBLE DESTROYER”
- “A fulldome game by InsertYourName”
- “Built with Unity3D”
- “Go to the url and press start to play”
- “Lock your phone rotation”
- “Press reset while pointing forward”
- “SFX freesound.org argitoth / baidnovan”
- “Music Fun & Games SD Sound Tracks”
- “Bubble point values vary by color”
- “Point your cursor and tap your screen”
- “The url capitalization is important.”
- “Ping your icon with the target button”
Game Operations:
The game operation controller handles the spawning of items during game play and limits the time for each sequence of bubble popping. It also turns on and off the intro to match the game play.
In the Hierarchy
- Create a new empty Game Object, reset the transform, rename it GameContainer
Background Music:
EndGame Screen:
Spawners:
In the Animation Window
In the Hierarchy
In Animation Window
Game Controller Setup:
The Game Controller connects to the server and allows players to send their input through their phones. There’s an example server set up at https://firedome.herokuapp.com You can set up your own server for your data or use the example.
In the Hierarchy
- Create a new GameObject, name it GameController
- Add a GameController Script, this will automatically also add Game Data and SocketIONetwork components to the GameController object
- Click the arrow next to Player Colors and set it to 12, then pick 12 distinct, bright colors
- Position: X-20 Y-6 Z0
- Rotation: X0 Y-90 Z 0
- Scale: X0.1 Y0.1 Z0.1
- Set the font size to 200
- Set the anchor to Middle Center
- Change the color to aqua
- Drag the ControlURL object onto the SocketIONetwork Show Url property
- Drag the Assets/Prefabs/Player prefab onto the Player Property of the Game Controller Component
Cleanup:
- Create a new Game Object reset transform and name it GameEnvironment
- Drag Directional Light, Floor, Roof, FogContainer, BubbleRing, OuterBubbleRing, Windzone, Windzone(1), and Reflection Probe into Game Environment
- Build Lighting in Lighting Window